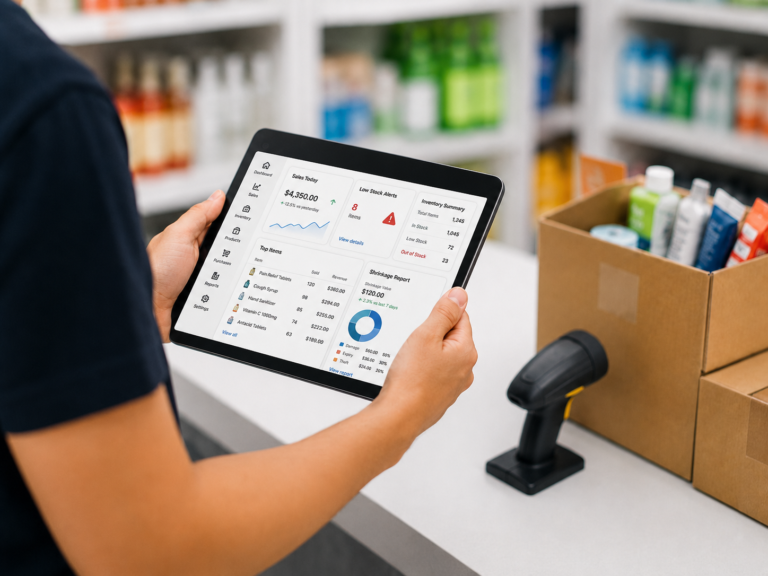
You can get a new EPOS system live and taking payments within a single working week. The core outcome is straightforward: a configured product library, at least one trained staff member, and a working payment terminal. Most small single-site businesses complete the full POS setup process in two to five days; multi-site operations typically need one to three weeks, depending largely on how clean their product data is before they start.
Your go-live checklist at a glance:
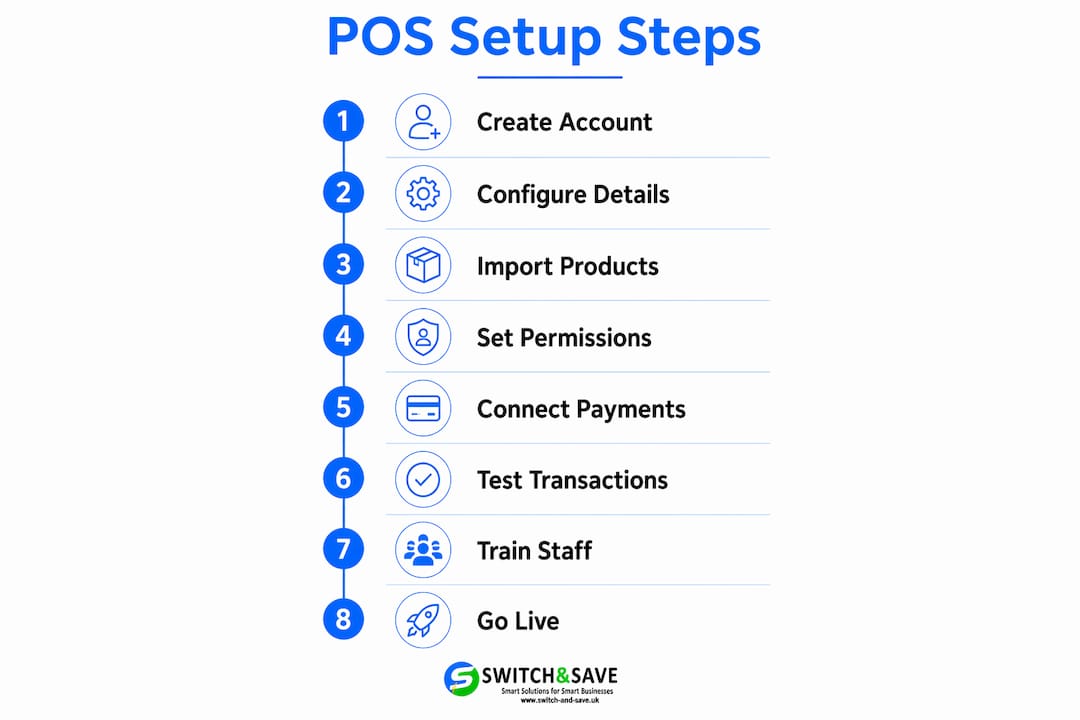
- Choose your package and sign up for an account
- Import or build your product catalogue with correct VAT rates
- Create user accounts and assign roles
- Connect your payment processing and run a test transaction
- Pair hardware (receipt printer, barcode scanner, cash drawer)
- Configure integrations (accounting, loyalty, e-commerce)
- Run a pilot shift and fix any issues
- Brief all staff and print quick-reference cards
Quick go-live sanity checks before your first trading day:
- Process a test sale and confirm the receipt prints correctly
- Process a test refund and verify it posts to your reports
- Check daily reconciliation totals match your test transactions
- Confirm offline mode activates if you disconnect from Wi-Fi
Planning and data preparation are the biggest factors in how long setup takes. Get your product CSV ready before you touch the software and you will cut your setup time significantly.
Table of Contents
- How do you choose the right POS setup for your business?
- How do you prepare your product catalogue before importing?
- How should you set up user accounts, roles and permissions?
- How do you connect card processing and confirm payment compliance?
- How do you connect hardware and keep your network reliable?
- Which integrations should you connect first?
- How do you test end-to-end before your first trading day?
- How do you train staff and create quick-reference guides?
- What are the final compliance checks before you go live?
- How do you keep your POS healthy after go-live?
- Why Switch-and-save is a recommended option for UK retailers and hospitality businesses
- Key takeaways
- What most POS guides get wrong about going live
- Switch-and-save setup and onboarding: what to expect
- Useful sources and further reading
- FAQ
How do you choose the right POS setup for your business?
The right starting point is matching your setup type to your actual trading pattern, not picking the most feature-rich option available.
Single-site retail (a boutique, convenience store, or salon) suits a cloud-based, fixed-till setup with a touchscreen terminal, barcode scanner, and receipt printer. You get real-time reporting remotely and automatic software updates without any server to manage.

Multi-site retail needs a cloud platform with centralised stock management so you can see inventory across all locations from one dashboard. Hardware stays the same per site; the difference is in the software tier.
Cafés and restaurants benefit from a hospitality-specific package that includes table management, kitchen printer routing, and split-bill functionality. A fixed counter terminal plus a mobile handheld for tableside ordering covers most setups.
Mobile market stalls or pop-ups work best with a tablet-based or mobile POS paired with a portable card reader, where offline mode is non-negotiable.
Comparing setup types at a glance
| Setup type | Recommended hardware | Key software features | Typical TCO consideration |
|---|---|---|---|
| Single-site retail | Fixed touchscreen till, scanner, printer | Inventory, loyalty, reporting | Monthly subscription + per-transaction fee |
| Multi-site retail | Fixed tills per site, central dashboard | Multi-store stock sync, consolidated reports | Higher software tier; hardware per site |
| Café/restaurant | Counter terminal + handheld | Table management, kitchen printer, split bills | Hospitality package; kitchen printer hardware |
| Mobile/pop-up | Tablet + portable card reader | Offline mode, simple catalogue | Low hardware cost; check offline capability |
When comparing providers, always separate subscription costs from payment processing fees. A low monthly fee paired with a high per-transaction rate can cost significantly more over a year than a slightly higher subscription with competitive processing rates. Calculate your total cost of ownership (TCO) across 12 months before committing.
Pro Tip: In a demo, ask the provider to show you the end-of-day reconciliation report, the offline mode, and how a refund posts to your accounts. These three things reveal more about day-to-day usability than any feature list.
For a deeper look at which features matter most for retail, the Switch-and-save guide to POS for retail covers the decision criteria in practical detail.
How do you prepare your product catalogue before importing?
Get this right before you touch the software. Messy product data is the single most common cause of a delayed go-live.
Every product record needs these fields as a minimum:
- Product name (as you want it to appear on receipts)
- SKU or barcode (unique per variant)
- Selling price (inclusive of VAT where applicable)
- Cost price (for margin reporting)
- VAT rate (0%, 5%, or 20% per HMRC category)
- Category (for reporting and till layout)
Step-by-step catalogue preparation
- Export your existing product list from your current system or spreadsheet.
- Add any missing fields (cost price and VAT rate are most often absent).
- Deduplicate: remove any product listed twice under different names.
- Assign categories consistently — pick a category structure and stick to it.
- For products with variants (size, colour), create a parent product with child variants rather than separate SKUs.
- For bundles (a meal deal, a gift set), create a bundle record and link the component SKUs.
- Save as a UTF-8 encoded CSV and do a sample import of 20–30 lines first.
- Spot-check the imported sample: verify prices, VAT rates, and barcodes on screen.
- Fix any errors in the source CSV, then import the full catalogue.
- Run a stock count and enter opening stock quantities after the import.
Accurate VAT rates in your product library are not optional. Errors cascade directly into your VAT returns and reconciliation reports. A children’s clothing item at 20% VAT instead of 0% will overcharge customers and distort your tax liability from day one.
Common errors to watch for:
- Prices entered excluding VAT when the system expects VAT-inclusive figures (or vice versa)
- Duplicate barcodes on different products
- Blank SKU fields (the system may auto-generate these, but they will not match your supplier data)
- Category names with inconsistent capitalisation causing duplicate categories in reports
How should you set up user accounts, roles and permissions?
Every person who touches your till needs their own login. Shared passwords make it impossible to trace who processed a refund or changed a price.
The minimum role structure for most small businesses:
| Role | Sales | Refunds | Price edits | Reports | Settings |
|---|---|---|---|---|---|
| Owner/Admin | ✓ | ✓ | ✓ | ✓ | ✓ |
| Manager | ✓ | ✓ | ✓ | ✓ | ✗ |
| Cashier | ✓ | ✗ | ✗ | ✗ | ✗ |
| Kitchen/Floor staff | View only | ✗ | ✗ | ✗ | ✗ |
Restrict refund permissions to manager level and above. Cashiers who can process their own refunds without approval create a straightforward fraud risk. The same applies to price edits — a cashier who can override prices at the till can discount items to friends without any record.
Pro Tip: Enable two-factor authentication on the owner and admin accounts from day one. If your EPOS provider supports it, use a PIN plus a manager card or a time-based one-time password (TOTP) app rather than a static PIN alone.
Audit logs record every transaction, price change, and login. Check them weekly during your first month. You are looking for refunds processed outside trading hours, repeated void transactions, or price edits on high-value items. These are the patterns that surface problems early, before they become significant losses.
For guidance on configuring software permissions, Switch-and-save’s software basics guide covers the common configuration tasks in plain language.
How do you connect card processing and confirm payment compliance?
There are two common approaches to connecting payments.
Integrated payments means your card terminal talks directly to your EPOS software. The transaction amount passes automatically from the till to the terminal, the payment result posts back to the sale record, and end-of-day totals reconcile automatically. This is the cleaner option for most small businesses.

A separate merchant account means your card terminal operates independently. Staff key in the amount manually, and you reconcile card totals against your EPOS reports at the end of the day. More steps, more room for keying errors.
Fee types to calculate for your TCO
| Fee type | What it covers | What to check |
|---|---|---|
| Monthly software subscription | EPOS software licence | Per-terminal or per-site pricing |
| Hardware cost | Terminals, printers, scanners | Upfront purchase or lease |
| Payment processing rate | Per-transaction percentage or pence | Debit vs credit card rates |
| Chargeback fee | Per disputed transaction | How often your sector sees disputes |
| PCI DSS compliance fee | Annual or monthly compliance charge | Whether it is included or billed separately |
Live payment test steps
- Process a test sale for a small amount (£0.01 or a test product).
- Confirm the receipt shows the correct amount, VAT breakdown, and business name.
- Process a full refund and confirm it posts to your reports.
- Process a partial refund and verify the remaining balance is correct.
- Check the transaction appears in your payment processor’s dashboard.
PCI DSS basics for UK merchants: As a card-accepting business, you are required to complete an annual Self-Assessment Questionnaire (SAQ) with your payment processor. Most small retailers using an integrated, cloud-hosted EPOS fall under SAQ A or SAQ A-EP, which are the simplest compliance tiers. Your processor will guide you through the questionnaire. Never store full card numbers or CVV codes anywhere in your system.
For VAT receipts, HMRC requires that a VAT receipt shows your VAT registration number, the VAT rate applied, and the VAT amount charged. Configure this in your receipt template before go-live.
How do you connect hardware and keep your network reliable?
Schedule hardware installation outside peak trading hours — ideally the evening before a quieter trading day. Rushing a hardware setup during a busy lunch service is a reliable way to create problems.
Hardware connection checklist:
- Receipt printer: connect via USB for a fixed till or Ethernet for a shared kitchen printer; install the driver and print a test page
- Cash drawer: connect to the receipt printer’s RJ11 port (the drawer opens on a print trigger)
- Barcode scanner: USB plug-and-play on most systems; test by scanning a product from your catalogue
- Card reader: pair via Bluetooth or USB depending on your model; confirm it appears in your EPOS settings
- Customer-facing display: connect via HDMI or USB and configure in display settings
Network checklist:
- Use a dedicated Wi-Fi network (VLAN or separate SSID) for payment devices, separate from your guest Wi-Fi
- Connect fixed tills to Ethernet where possible — Wi-Fi is fine for handhelds and mobile terminals
- Test your internet failover: if your broadband drops, does your EPOS switch to offline mode automatically?
- Set your router to assign static IP addresses to fixed tills and printers so they do not lose their network address after a reboot
Pro Tip: Label every cable at both ends before you close up the counter. A strip of masking tape and a marker takes two minutes and saves an hour of confusion the first time something needs replacing.
For a full hardware wiring guide, the Switch-and-save POS hardware setup guide covers peripheral connections and common troubleshooting steps.
Which integrations should you connect first?
Connect integrations in order of operational impact. Payments first (covered in Step 4), then inventory sync, then accounting, then loyalty and e-commerce.
Integration priority order:
- Payment processing — already connected; confirm the data flow is posting correctly to your EPOS reports
- Inventory sync — if you sell online as well as in-store, connect your e-commerce platform so stock levels update in real time
- Accounting export — connect Xero, QuickBooks, or Sage so daily sales post automatically to your nominal accounts
- Kitchen printer routing — for hospitality, map each menu category to the correct printer (bar, kitchen, pass)
- Loyalty programme — configure points rules and test a points earn and redemption before go-live
- CRM or email marketing — connect only after the core integrations are stable
Accounting mapping example
When you connect your accounting software, map your EPOS sales categories to the correct nominal codes:
- Food sales → Revenue: Food (e.g. nominal 4000)
- Drink sales → Revenue: Drinks (e.g. nominal 4001)
- VAT collected → VAT Control Account
- Cash payments → Cash in Hand
- Card payments → Card Receipts Clearing
Run your end-of-day close in the EPOS, then check that the journal entry appears in your accounting software with the correct totals. Do this on your first three trading days to catch any mapping errors early.
GDPR note: If you collect customer email addresses for loyalty or marketing, you need explicit consent at the point of collection. A checkbox at the till screen or a signed paper form both work. Keep records of consent and do not add customers to marketing lists without it. Retain only the data you genuinely need — name, email, and purchase history for loyalty purposes is sufficient for most small businesses.
How do you test end-to-end before your first trading day?
Do not skip this step. A one-hour test session before opening prevents a chaotic first morning.
Test cases to run
- Standard sale: scan a product, apply a discount, process card payment, print receipt
- Cash sale: process a cash payment, confirm change calculation, open cash drawer
- Split payment: part cash, part card on a single transaction
- Refund: full refund on a completed sale; confirm stock increments back
- Void: cancel a transaction mid-way through; confirm no charge is posted
- VAT check: confirm the receipt shows the correct VAT rate and amount for a standard-rated item
- Stock decrement: sell one unit of a tracked product and confirm stock count reduces by one
- Receipt format: check business name, address, VAT number, and date all appear correctly
- Offline mode: disconnect from Wi-Fi and process a sale; reconnect and confirm it syncs
For each test, note the expected result and the actual result. Any discrepancy is a configuration issue to fix before trading.
Pilot shift plan:
- Duration: one full trading period (a morning session or a lunch service)
- Staff: your most confident operator plus one observer
- Scenarios: replicate your busiest transaction types (multiple items, discounts, card payments)
- Feedback: collect issues on a simple form (what happened, when, on which terminal)
- Reconciliation: at the end of the pilot, compare EPOS totals against your card machine settlement and cash in the drawer
A staged rollout works well for multi-terminal setups. Test one terminal in a real shift, resolve any issues, then bring the remaining terminals live one at a time.
How do you train staff and create quick-reference guides?
Every member of staff who uses the till needs to be able to do five things without hesitation: process a sale, apply a discount, process a refund, handle a cash transaction, and know who to call if something goes wrong.
Minimum training content:
- Processing a standard sale (scan, quantity, payment)
- Applying a percentage or fixed-amount discount
- Processing a refund with manager authorisation
- Safe cash handling: counting the float, recording cash drops
- How to call or message the support contact
Training plan:
- 30 minutes: walkthrough of the till interface with the trainer demonstrating each task
- 30 minutes: hands-on practice using test products (no live transactions)
- 30 minutes: supervised live transactions with the trainer observing
- Sign-off: each staff member processes three complete transactions correctly before being cleared to work unsupervised
Designate one person as your superuser. They know the system in more depth, handle first-line troubleshooting, and are the first point of contact before escalating to your provider’s support team.
Pro Tip: Print a laminated quick-reference card for each till position. Include: how to process a refund, how to open the cash drawer manually, the support phone number, and the manager PIN override procedure. Staff under pressure during a busy service will not remember verbal instructions.
For seasonal or temporary staff, a 20-minute condensed version of the above covers the basics. Run it the morning before their first shift, not the week before.
What are the final compliance checks before you go live?
Complete these before your first trading day. None of them take long, but skipping any one of them creates a problem you will have to fix under pressure.
UK VAT checklist:
- Every product has the correct VAT rate assigned (0%, 5%, or 20%)
- Your VAT registration number appears on all receipts
- The receipt shows the VAT amount as a separate line item
- Mixed-rate transactions (e.g. a hot drink at 20% and a cold sandwich at 0%) calculate correctly
GDPR and data privacy:
- Customer records contain only the data you need (name, contact, purchase history for loyalty)
- Marketing consent is captured explicitly and stored
- You have a process for handling a customer’s request to delete their data
- Your POS provider’s data processing agreement is signed
Operational contingency:
- You have a fallback payment method (a standalone card reader or cash-only procedure) if the EPOS goes down
- You have a spare receipt roll and know where to find it
- You have the provider’s emergency support number saved and visible to staff
Scheduling your installation during non-peak hours and verifying receipts, stock updates, and payment totals immediately after setup significantly reduces the risk of a disruptive first trading day. — EPOS setup guidance for UK stores
This article is general guidance, not legal or tax advice. Confirm your specific VAT obligations and data protection requirements with HMRC and the ICO, or a qualified adviser, for your own situation.
How do you keep your POS healthy after go-live?
A simple maintenance routine prevents most problems before they happen.
Routine maintenance schedule:
- Daily: run end-of-day close, reconcile cash and card totals, back up if your system does not auto-backup to the cloud
- Weekly: review audit logs for unusual activity, check for software update notifications, verify stock levels against physical counts on fast-moving lines
- Monthly: full stock reconciliation, review user accounts (remove leavers), check PCI DSS compliance status, review transaction fee statements against your TCO estimate
Common faults and quick fixes:
- Receipt printer not printing: check paper roll, check USB/Ethernet connection, restart the printer
- Barcode scanner not reading: clean the lens, check USB connection, test with a known good barcode
- Card reader not pairing: re-pair via Bluetooth settings, check the reader is charged, restart the EPOS app
- Till not connecting to network: check Ethernet cable, restart the router, check static IP assignment
Before you call support, capture:
- The exact error message or description of what happened
- The transaction ID (if relevant)
- The device name or terminal number
- A screenshot if possible
- The time and date the issue occurred
For firmware and software updates, apply them during a closed period — Sunday evening or before opening on a Monday. If your provider allows you to delay an update, test it on one terminal first and confirm all peripherals still function before pushing it to the rest of your estate.
Why Switch-and-save is a recommended option for UK retailers and hospitality businesses
Switch-and-save offers bundled EPOS systems that combine hardware, AI-powered cloud software, and integrated payment processing in a single package, with UK-based support throughout setup and beyond.
What the system covers:
- Real-time sales and inventory management across single and multiple sites
- Remote access via a cloud dashboard (check your sales from anywhere)
- Fast checkout with touchscreen terminals and integrated card processing
- Multi-terminal and multi-store support within a single account
- Retail and hospitality-specific packages with relevant features for each sector
Switch-and-save’s packages are tiered to match business size. The standard package suits a single-site shop or café getting started; the retail and hospitality packages add the features that growing businesses need (advanced stock management, table management, loyalty). Transparent pricing means you see the full cost before you commit.
Trust signals worth noting:
- UK-based technical support (not an overseas call centre)
- Free demos available before purchase
- On-site and remote setup options
- Customer reviews published on the website
Pro Tip: Book a demo before you finalise your hardware list. The demo call is also a scoping session — a good provider will tell you exactly which hardware you need and which you do not, saving you from buying kit that sits in a box.
If you are comparing options, the Switch-and-save hospitality EPOS system page covers the restaurant and café feature set in detail.
Key takeaways
A successful POS go-live comes down to clean product data, tested payments, trained staff, and a contingency plan — everything else follows from those four foundations.
| Point | Details |
|---|---|
| Prepare data first | Clean your product CSV with correct VAT rates before importing — errors cascade into reports and tax returns. |
| Calculate TCO, not just subscription | Compare monthly fees plus per-transaction rates across 12 months to find the true cost of ownership. |
| Test before trading | Run a full end-to-end test (sale, refund, void, receipt, offline mode) and a pilot shift before your first live day. |
| Train to a sign-off standard | Every staff member should complete three supervised transactions before working unsupervised. |
| Switch-and-save for UK setup | Switch-and-save offers bundled EPOS hardware, cloud software, and UK support with retail and hospitality packages suited to small and medium businesses. |
What most POS guides get wrong about going live
Most POS setup articles focus on the software steps and treat the go-live as a finish line. The businesses that struggle after launch almost always have the same two problems: bad product data and missing permissions.
Bad product data is rarely about laziness. It is usually about rushing the import to hit a deadline. A shop owner who imports 800 products in an afternoon without spot-checking VAT rates will spend the next three months correcting receipts and explaining discrepancies to their accountant. The fix is simple: import 30 products, check them thoroughly, then import the rest. That extra hour saves days of remedial work.
Missing permissions is subtler. A cashier who can process refunds without manager approval is not a risk you notice until the end-of-month reconciliation does not add up. By then, the pattern is established and the audit trail is long. Setting the role structure correctly on day one takes 15 minutes. Unpicking the consequences of not doing it takes considerably longer.
There is also a tendency to over-integrate at launch. Connecting your accounting software, loyalty programme, e-commerce platform, and email marketing tool on the same day you go live is a recipe for confusion. When something goes wrong (and something always does on day one), you want to know immediately whether it is a till issue, a payment issue, or an integration issue. Keep it simple for the first week. Add integrations one at a time once the core system is stable.
The other thing most guides underestimate is the value of scheduling. Installing outside peak hours and testing the night before your first trading day is not just good practice — it is the difference between a confident opening and a stressed one. Your staff will perform better on a system they have already used, even if only for 30 minutes the evening before.
Switch-and-save setup and onboarding: what to expect
Getting your EPOS live faster is the concrete advantage Switch-and-save offers small and medium UK businesses. Rather than piecing together hardware, software, and a payment processor from three separate suppliers, you get a single bundled package with one support contact and a setup process that is guided from the start.
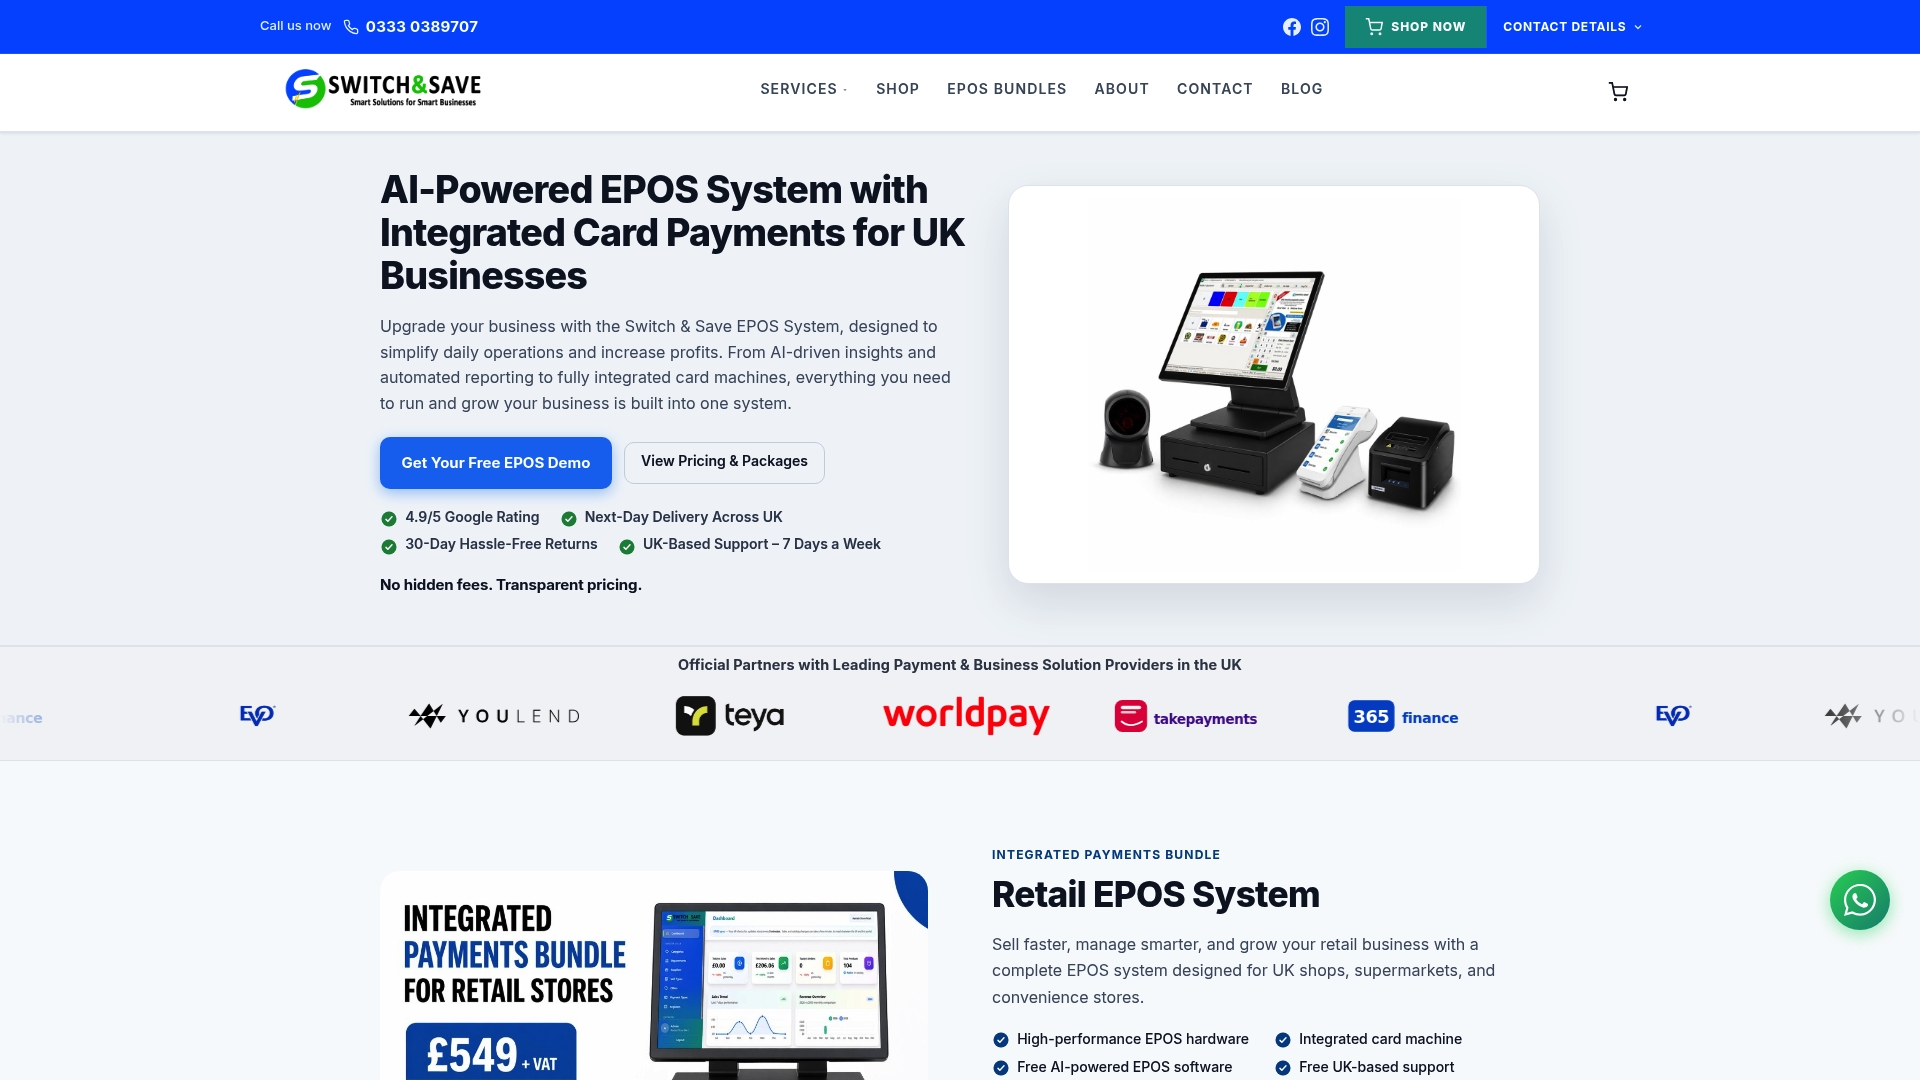
Switch-and-save’s packages cover standard retail, premium retail, and hospitality setups. Each includes the hardware, the SSPOS cloud software, integrated card processing, and UK-based setup support. Remote setup is available for straightforward single-site installs; on-site setup is available for larger or more complex configurations.
What you get with a Switch-and-save setup:
- Hardware configured and tested before dispatch
- Software pre-loaded with your business details
- Guided product import support
- Staff training materials included
- UK support line available post-launch
When you book a demo, expect a 30–60 minute scoping call. The team will confirm which package fits your business, clarify your hardware requirements, and give you a clear timeline to go-live. View EPOS system packages and book your demo directly from the product page.
Useful sources and further reading
The resources below support the guidance in this article and are worth bookmarking for your setup process.
- How to set up a POS system for your small business — Small Business UK: practical overview of the setup sequence for UK small businesses, including hardware, product import, and user accounts.
- How to choose the best retail POS system in the UK — POS-Hardware Ltd: clear guidance on separating subscription costs from processing fees and calculating TCO.
- EPOS system setup, installation and support guide — Speedy Payments: covers installation scheduling, receipt verification, and stock update checks.
- POS system onboarding: how long does it take? — Celerant: useful for understanding what drives onboarding timelines and how data preparation affects duration.
- Switch-and-save retail setup guide — Switch-and-save: comprehensive retail-specific checklist covering go-live steps for UK shops.
- POS installation guide for UK retail and hospitality — Switch-and-save: detailed hardware installation instructions and peripheral connection diagrams.
| Resource | Best for |
|---|---|
| Small Business UK — POS setup | First-time setup overview and UK context |
| POS-Hardware Ltd — TCO guide | Comparing costs and choosing a provider |
| Speedy Payments — EPOS install guide | Hardware scheduling and post-install checks |
| Celerant — onboarding timeline | Planning your migration and data prep |
| Switch-and-save — retail setup guide | Step-by-step retail go-live checklist |
| Switch-and-save — POS installation guide | Hardware wiring and peripheral setup |
FAQ
How do you set up a POS system step by step?
The standard sequence is: create your account, configure business details, import your product catalogue with correct VAT rates, set up user roles, connect payment processing, pair hardware, run end-to-end tests, and train staff. Most small single-site businesses complete this in two to five days.
Can you set up your own POS system without technical help?
Yes. Cloud-based EPOS systems are designed for non-technical users, and most providers offer guided setup, video tutorials, and UK-based support. The main requirement is having your product data ready in a clean spreadsheet before you start.
How long does it take to set up a POS system?
A single-site setup typically takes two to five days; multi-site operations usually need one to three weeks. Planning and data preparation are the biggest variables — a clean product CSV can halve your setup time.
What is PCI DSS and does it apply to my small business?
PCI DSS (Payment Card Industry Data Security Standard) applies to any business that accepts card payments. Most small retailers using an integrated cloud EPOS fall under SAQ A, the simplest compliance tier. Your payment processor will provide the annual Self-Assessment Questionnaire.
Does Switch-and-save offer setup support for new customers?
Switch-and-save provides guided setup support, pre-configured hardware, and UK-based technical assistance as part of its EPOS packages. A demo call is available before purchase to scope your requirements and confirm the right package for your business.