Simplifying your EPOS setup means following a structured, phased process that covers hardware readiness, software configuration, and thorough testing before you open your doors to customers. A well-planned electronic point of sale installation reduces checkout errors, speeds up staff onboarding, and protects your business from costly downtime on day one. The good news is that effective setup improves accuracy and speeds up customer checkouts across multiple locations, whether you run a single boutique or a chain of hospitality venues. This guide walks you through every stage of how to simplify EPOS setup, from the tools you need before you start to the testing steps that prevent nasty surprises at launch.
What do you need before starting your EPOS setup?
Getting your prerequisites right is the single biggest factor in a smooth installation. Rushing into hardware connections without a clear checklist is how most retail and hospitality businesses end up with half-working tills on their busiest trading day.
Hardware components to gather first
Before you plug anything in, confirm you have every physical component accounted for. A typical retail or hospitality EPOS bundle includes:
- POS terminal or touchscreen: The central unit that runs your software. A dual-screen EPOS terminal with a built-in printer reduces cable clutter and simplifies counter layouts.
- Receipt printer: Thermal printers are standard. Confirm paper roll size compatibility before ordering stock.
- Barcode scanner: Wired scanners are more reliable for high-volume retail; wireless suits hospitality floor staff.
- Cash drawer: Verify it connects via the receipt printer’s RJ11 port, which is the most common configuration.
- Card payment terminal: Confirm it integrates with your chosen EPOS software before purchase.
Software and network readiness
Software preparation is just as important as the physical kit. Gather your software licences, confirm the version is up to date, and prepare a configuration template that includes your tax rates, product catalogue, and payment methods. A configuration template means you are not entering the same data manually on every till.
Your network must be stable before setup begins. Use a wired Ethernet connection for the main terminal where possible, and confirm your broadband router is within reach. Test your internet speed and check that your router’s firewall does not block the ports your EPOS software requires.
| Readiness check | What to confirm |
|---|---|
| Hardware inventory | All components present and undamaged |
| Software licence | Valid, activated, and on the latest version |
| Network connection | Stable wired or Wi-Fi connection confirmed |
| Power supply | Sufficient sockets and surge protection in place |
| Staff roles | Assigned team members for setup and testing |
Staff roles before you begin
Assign a lead person for the installation before the engineer or your own team starts work. Staff training in sales transactions, refunds, and inventory management reduces errors and builds confidence for smooth operations. Knowing who is responsible for what prevents confusion when questions arise mid-installation.
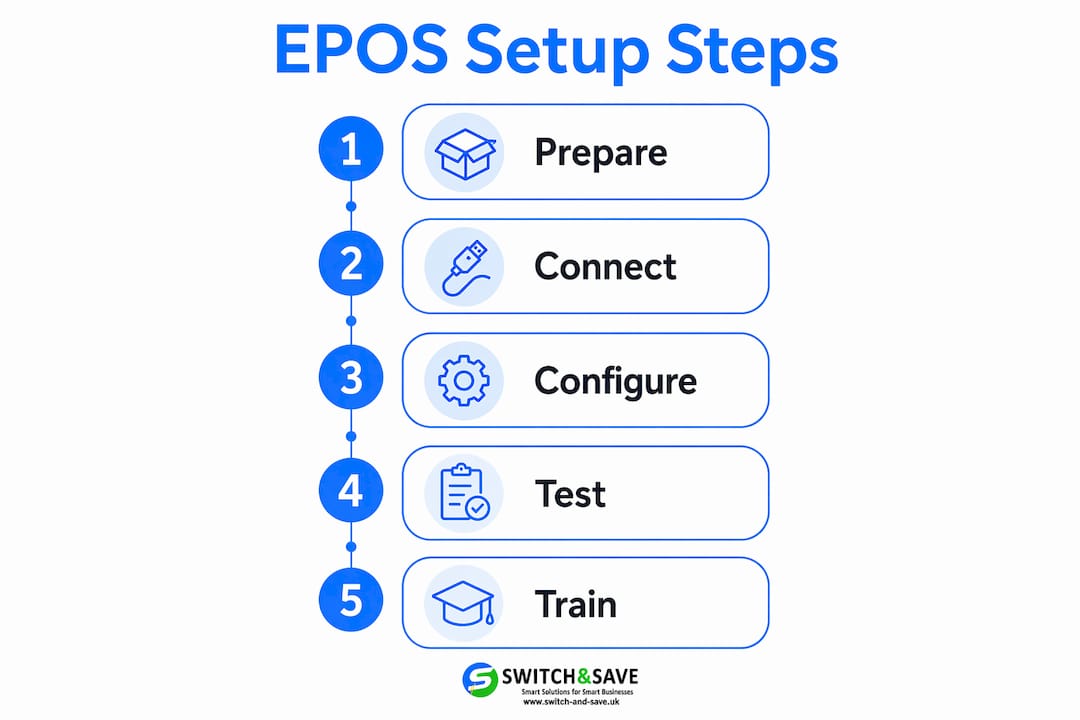
How do you execute a step-by-step EPOS installation?
A phased go-live checklist approach drives simplification by sequencing verification layers logically rather than rushing to final tests. Think of it as four distinct phases, each of which must pass before you move to the next.
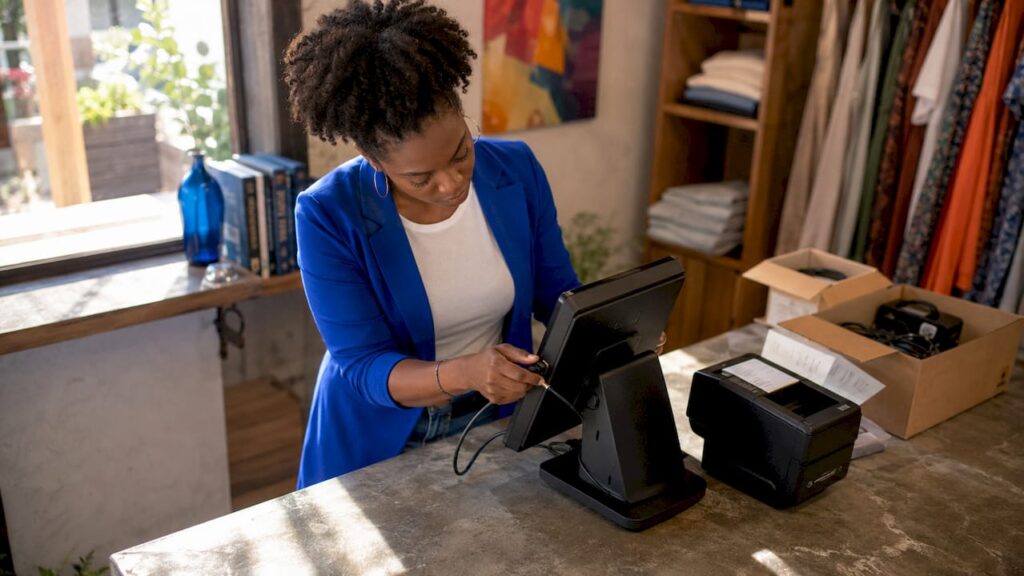
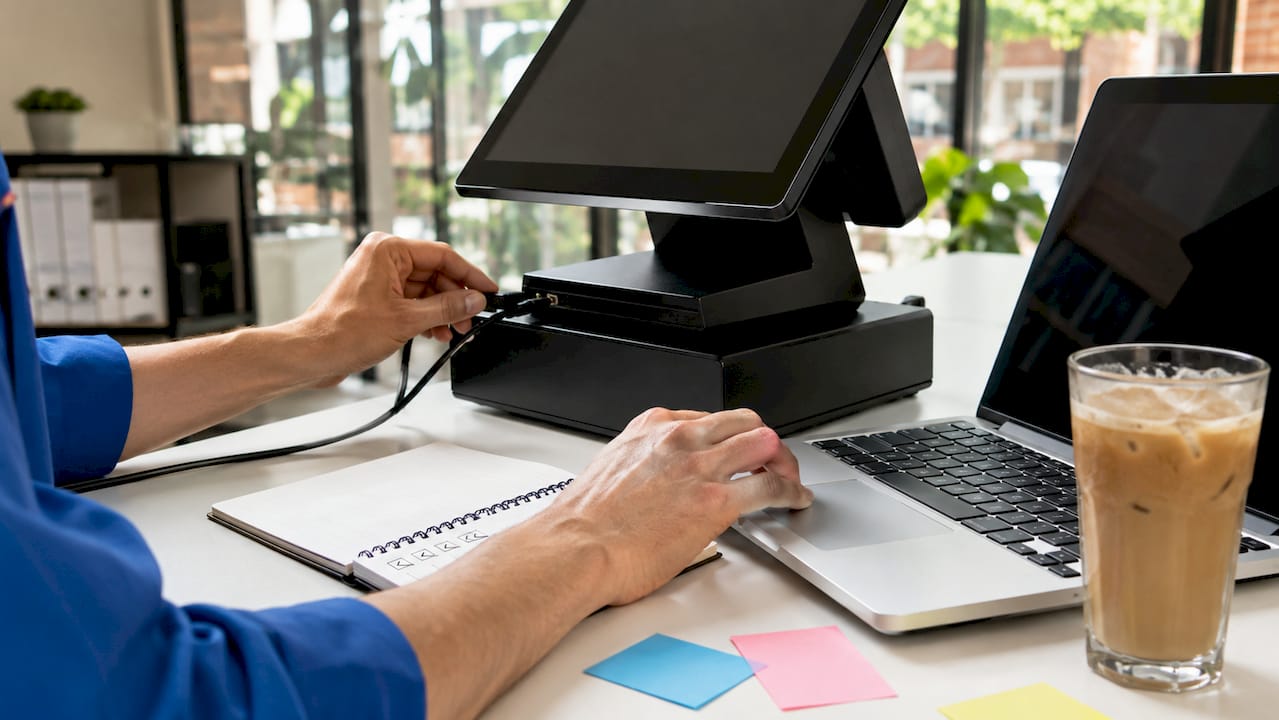
Phase 1: Hardware installation and connectivity. Mount your terminal, connect your receipt printer, scanner, and cash drawer, then power everything on. Confirm each peripheral is recognised by the operating system before touching the software. Check every cable connection physically. A loose USB connection is one of the most common causes of scanner failures that get misdiagnosed as software faults.
Phase 2: Software installation and configuration. Install your EPOS software using your prepared configuration template. Enter your product catalogue, set VAT rates correctly (standard 20%, reduced 5%, or zero-rated as applicable), and configure your payment methods. If you are using SSPOS software, import your product data via CSV to avoid manual entry errors on large catalogues.
Phase 3: Integrations testing. Test your payment gateway, inventory sync, and any accounting integrations such as Xero or QuickBooks. Run a real card transaction end to end, including a refund. Confirm stock levels update in real time after each test sale. For hospitality businesses, test your kitchen display or printer routing at this stage.
Phase 4: User acceptance testing. This is where most businesses cut corners, and it is where most launch-day problems originate. Run through every transaction type your staff will encounter: standard sale, split payment, discount, void, and end-of-day report. Testing peripherals in transaction sequence and including recovery scenarios reduces deployment issues significantly.
Pro Tip: Test your receipt printer with a paper-out scenario before go-live. Remove the paper roll mid-transaction and confirm the system prompts the operator correctly rather than freezing or losing the sale. This single test catches more real-world failures than any other.
What are the best practices for multi-location or multi-till setups?
Scaling your point of sale across more than one site or till introduces a specific risk: configuration drift. This is where each location ends up with slightly different settings, product names, or tax codes, which creates reporting inconsistencies and staff confusion. Standardising hardware kits and configuration templates across stores prevents this and simplifies every future rollout.
The most practical way to achieve this is to define a baseline configuration for each site type before you deploy anywhere. A café format will have different product categories and printer routing than a clothing boutique, but within each format, every till should be identical.
Key standardisation practices
- Baseline OS image: Create a single approved operating system image with all drivers and software pre-installed. Deploying from this image means every terminal starts from the same point.
- Bill of materials (BOM) per site type: Document the exact hardware model numbers approved for each format. This prevents ad hoc substitutions that cause driver conflicts later.
- Configuration templates: Store your product catalogue, tax settings, and user roles in a master template file. Apply it to every new till rather than configuring from scratch.
- Lane type definitions: Define whether a till is a standard checkout, a self-service kiosk, or a hospitality order point. Each lane type gets its own template and testing checklist.
Rollout planning: batch deployment and rollback criteria
| Approach | Single-site rollout | Multi-site rollout |
|---|---|---|
| Deployment method | Full cutover in one session | Batch by site or by till group |
| Rollback trigger | Hardware failure or data loss | More than 20% of tills failing UAT |
| Escalation path | Supplier support line | Dedicated project lead per region |
| Testing requirement | Full UAT before go-live | UAT sign-off per batch before next batch |
Deployment plans should predefine rollback triggers and batch release criteria to facilitate controlled rollouts and quick issue resolution. Without these criteria written down in advance, teams tend to push through problems under time pressure, which compounds failures rather than resolving them.
Pro Tip: Run your first multi-site deployment at your quietest location. Use it as a live pilot, gather every issue that arises, and update your template and checklist before rolling out to busier sites.
How do you troubleshoot and avoid common EPOS setup mistakes?
The most common mistake in any EPOS installation is skipping earlier testing layers because the later ones seem to be working. Avoid testing only the happy path. A successful standard sale does not confirm that your scanner recovers correctly after a disconnect, or that your printer handles a void transaction without jamming.
Here are the errors that cause the most disruption, and how to prevent them:
- Skipping hardware verification before software setup. If a peripheral is not confirmed working at the OS level first, any software fault becomes impossible to diagnose cleanly. Always complete Phase 1 before Phase 2.
- Entering product data manually on every till. Manual entry introduces pricing errors and inconsistencies. Use a CSV import or a cloud-based product catalogue that pushes to all tills simultaneously.
- Failing to test edge cases. Testing edge cases such as printer paper-out and network reconnect during UAT prepares the system for real-world service conditions. These recovery tests catch failures that normal transaction tests do not reveal.
- No defined escalation path. When something goes wrong on launch day, staff need to know exactly who to call and what steps to take. Write this down and post it near every till.
- Undertrained staff. A well-configured system still fails if the team does not know how to use it. Schedule a minimum of one hour of hands-on practice per staff member before go-live, covering sales, refunds, and end-of-day procedures.
For businesses looking to reduce human error beyond the setup phase, understanding how EPOS systems reduce errors in daily retail operations is worth exploring as a follow-on step.
Key takeaways
A simplified EPOS setup requires four sequential phases: hardware verification, software configuration, integrations testing, and user acceptance testing, with standardised templates applied at every stage.
| Point | Details |
|---|---|
| Prepare before you install | Confirm all hardware, software licences, and network readiness before starting any installation work. |
| Follow phased installation | Complete each phase fully before moving to the next to catch issues early and avoid compounding faults. |
| Standardise configurations | Use baseline OS images and configuration templates to keep every till and every site consistent. |
| Test beyond the happy path | Include recovery scenarios such as paper-out and network reconnect in your UAT to uncover hidden failures. |
| Define rollback criteria | Write down your escalation paths and rollback triggers before deployment, not during a live crisis. |
Why phased testing changed how I think about EPOS rollouts
The most underestimated part of any EPOS installation is what happens after you think it is working. I have seen businesses complete a full hardware and software setup, run one successful test transaction, and declare the system ready. Then on opening day, the receipt printer jams during a refund, the scanner drops connection after ten minutes, and the end-of-day report does not match the card terminal totals.
The fix is not more expensive hardware. It is structured testing that goes beyond the obvious. When you test a paper-out scenario or a scanner swap mid-transaction, you are not being overly cautious. You are replicating the exact conditions your busiest Saturday afternoon will create. Most launch-day failures are not random. They are predictable failures that nobody tested for.
I also think businesses underestimate the value of a written configuration template. The first time you set up a till from scratch, it takes hours. The second time, with a template, it takes thirty minutes. By the third site, your team is confident and consistent. That consistency pays back every time you add a new member of staff, open a new location, or need to replace a faulty terminal quickly.
The businesses that get EPOS setup right are not the ones with the most technical knowledge. They are the ones that treat setup as a process, not a one-off task. A complete POS installation guide gives you the framework. Your job is to follow it without skipping steps, even when you are under pressure to open on time.
— Amir
Ready to set up your EPOS system with confidence?
Switch-and-save makes the process straightforward for UK retail and hospitality businesses. Whether you are setting up your first till or rolling out across multiple sites, Switch-and-save provides integrated hardware and software packages designed to work together from day one, with no compatibility guesswork.
Browse the full range of EPOS systems for retail and hospitality, or explore the complete EPOS systems catalogue to find the right package for your business size and format. Switch-and-save also offers local EPOS experts across the UK who can support your installation in person. Get in touch today for a free demo and transparent pricing with no hidden costs.
FAQ
What is the quickest way to simplify EPOS setup?
Use a configuration template that includes your product catalogue, tax rates, and payment settings, then apply it to every till rather than configuring each one manually. This single step removes the most time-consuming and error-prone part of the process.
How long does a typical EPOS installation take?
A single-till retail setup takes between two and four hours when hardware, software, and network readiness are confirmed in advance. Multi-site rollouts vary depending on the number of locations and whether standardised baseline images are used.
What should I test before going live with my EPOS system?
A comprehensive go-live checklist covers hardware readiness, integrations testing, staff training, and end-to-end testing before launch. Include recovery scenarios such as printer paper-out and scanner reconnect, not just standard sale transactions.
How do I avoid configuration drift across multiple tills or sites?
Standardisation of hardware and software configurations is the most reliable method. Define a baseline OS image and a master configuration template, then deploy from these consistently rather than setting up each till individually.
Do I need professional support to install an EPOS system?
Not always, but having a clear installation guide and a direct support line significantly reduces risk. Switch-and-save provides UK-based support and free demos, which means you have expert guidance available if anything unexpected arises during setup.